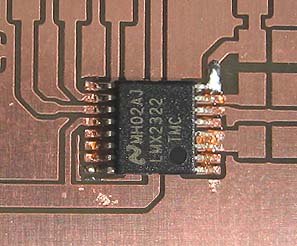
How to solder smd components
This project will explain how you solder smd (surface mounted components).
You will be amazed how easy it is and how good the result will be.
All you need is so get are some basic equipment's and I will explain how you should solder.
All contribution to this page are most welcome!

Background
There are both advantages and disadvantages to use smd components rather than hole mounted components. The main advantages is that you don't have to drill any holes in the PCB and the size will be much smaller by using smd. The small size is also the main disadvantages, because they can be difficult to handle and solder. Many people hesitate to use smd because they think they are not capable to solder them. This fear is great exaggerated and I will show you how simple it can be.
By using the correct tools and some basic knowledge you will soon become an expert in soldering smd components.

(1.) Clean PCB
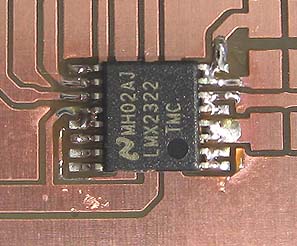
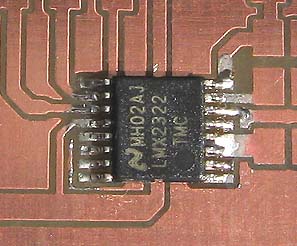
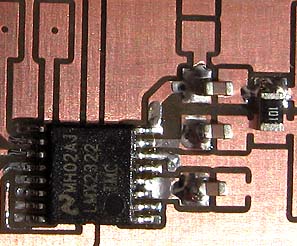
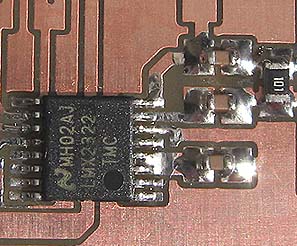
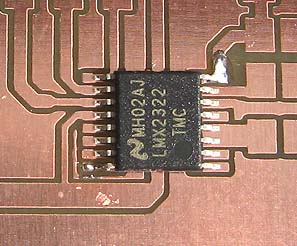
(2.) Pre-fixing of the SO-circuit
Clean PCB
Pre-fixing the SO-circuit
Make sure you have a clean PCB. I use cooper polish to remove all kinds of oxidation and Acetone (nail polish remover) to remove all kind of fat surface from thumbprints. Try not to touch the PCB with your fingers.

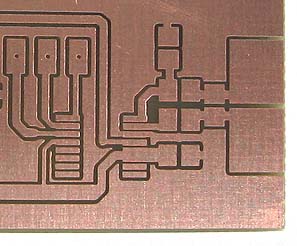
(All PCB in my KITs are cleaned and ready to be soldered)
Place the circuit at its position and make sure you have put it in correct direction.
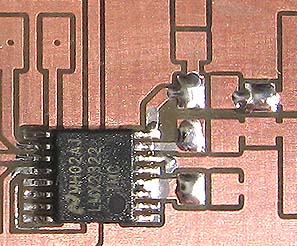
I fixate the circuit at the top right corner and the bottom left corner.
Since you only have soldered two legs, you can easy correct the position of the circuit. At this point the soldering of the legs are not important. More important is that you have good match of the PCB strip lines and the legs of the circuit.

(3.) Applying rosin
(4.) Soldering all legs
Soldering all legs
Soldering all legs
Now the circuit is in correct position and you can now apply a small amount of rosin. The rosin will make the solder to flow out nicely and clean up any rests of non visible oxidation. Here I have soldered all legs. It doesn't matter if you get bridges, make sure all pins have got a nice soldering surface. As you can see I have got some bridges and overflow of solder.

(5.) Cleaning up with wick
(6.) Preparing pads for smd components
Soldering all legs
Soldering all legs
Now it is time to clean up the soldering and all legs of the circuit.
I use a wick which I have impregnated with a small amount of rosin. I place the which between the tip of the soldering iron and the legs of the circuit. The heat of the soldering iron will pass into the wick and down to the soldering which will melt. Any over flow of lead will be absorbed into the wick. The procedure is very easy and the result will be astonishing. No bridges and no overflow of solder.
The soldering procedure is almost the same for smd components as resistors and capacitors. I apply a small amount of solder to one pad of the two pads. (Not both !) If you get to much solder, you can easy use the wick to remove overflow.

(7.) Pre mounting smd components
(8.) Final soldering smd components
Soldering all legs
Soldering all legs
I place the component (using tweezers) to the pad and re-heat the soldering to fixate the component. Now the component is fixed in one end. Try to center the component and make it look nicely. I solder the other end of the components and as you can see the results looks pretty good. If it doesn't look good you can always use the wick to clean it up and re-solder the components.


Another good link: http://www.infidigm.net/articles/solder/

Final word
A good board with nice soldering will improve the quality of your projects, specially if you are into RF homebrewing.
Now you know how to solder smd components to your PCBs. With some simple equipments you will get perfect results.

I hope this page will inspire all of you to try smd components in your projects.

You can always mail me if there is anything unclear.
I wish you good luck with your projects and thanks for visit my page.


Back to main Page  |  Contact Me  |  Cheap components

Copyright © Last modified on 18 may 2006.